Setting file and directory filters |
This topic explains how to setup file filters to exclude some files or directories or include them.
Setting file and directory filters can be used to exclude files and directories from synchronization. The reasons for this can be for instance:
- Private files that you don't want to spread to the second computer.
- Files that apply only for exactly this computer (settings, ..)
- Files of temporary nature, that can easily be restored from other sources.
- Files that can not be synchronized, because they are constantly in use, and would produce an error during synchronization.
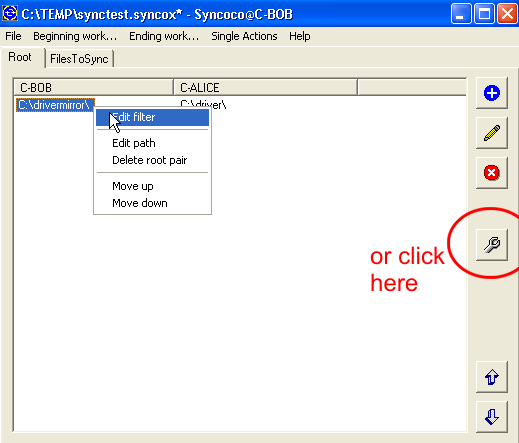
In the root tab, right click on one item and from the popup menu then choose Edit filter. Or select one item, and click on the tool button.
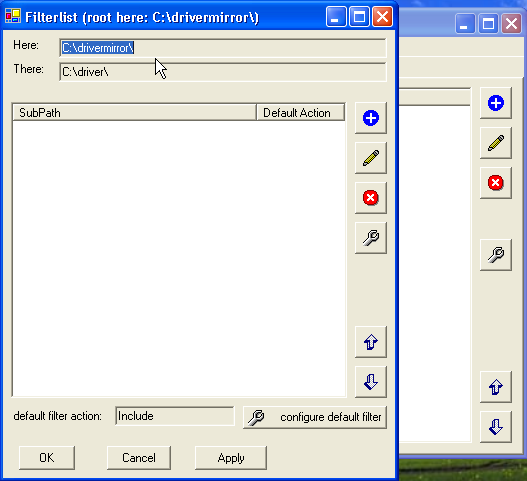
An empty filter list will appear. To exclude or include all files in this directory and all subdirectories, click on the Configure default filter button on the bottom.
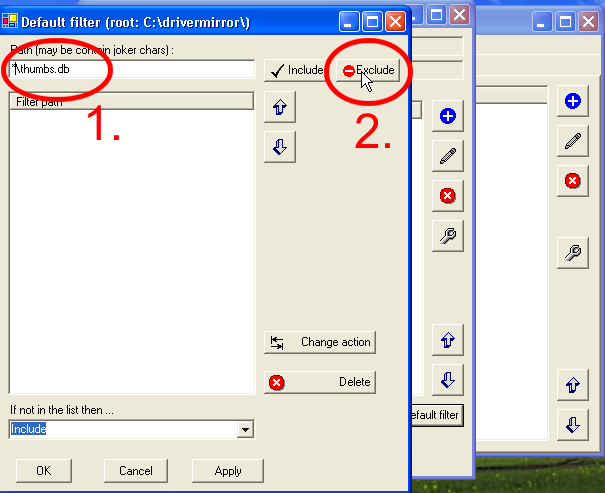
After you have clicked on the Configure default filter button ,you will see the default filter list. Now you can include or exclude files. In the example screnshot above, I wanted to exclude all files named thumbs.db. First, write the expression *\thumbs.db into the edit box (1.), then press the exclude button (2.).
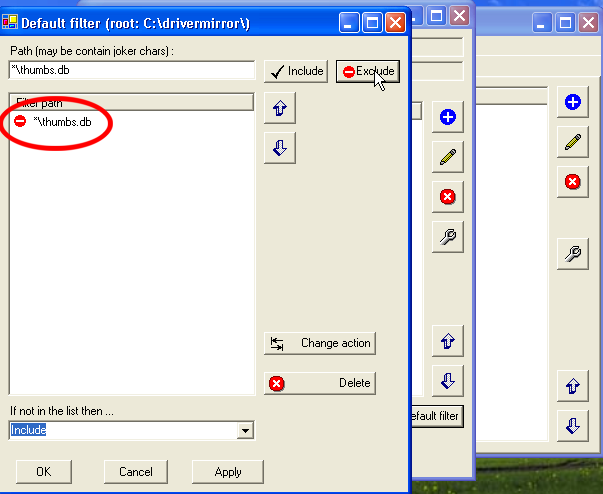
Now the expression appears in the list with an exclude icon. You can now add as many expressions as you want. Either press the include button to include them, or the exclude button to exclude them.
The order in which the items appear matters. For a given file or directory name the list is searched from top to the bottom, and if one item matches, the action (either include or exclude determines whether or not the file/directory is included.
You can also specify a default action that is applied if non of the expression matches. From the dropdown box If not in the list then.. choose either Include or Exclude
Press OK to close the default filter list.
You may have subdirectories in your root directory which may need other filters. For instance, you may have a subdirectory C-programming for which you want to exclude all .sym and .obj files. Look at the next picture how to do that.
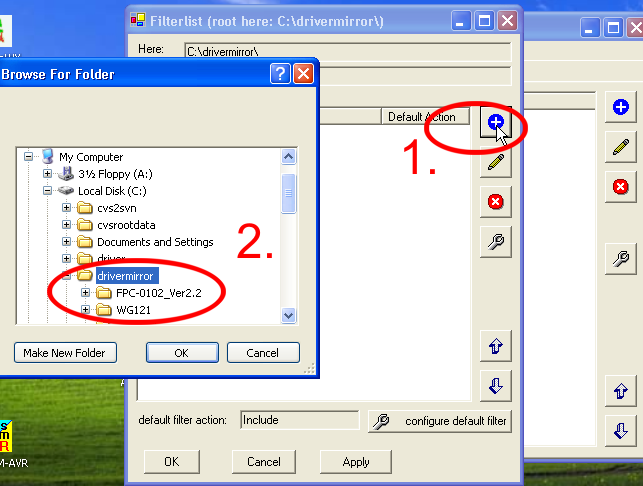
In the filter list dialog, click on the blue plus button (1.). From the folder browsing dialog, select any subdirectory of the current root (2.). You can choose even sub-sub directories (any depth). Press Ok. You will see the chosen subdirectory in the list now. An error message will appear if the directory you have chosen was not a subdirectory of the current root.
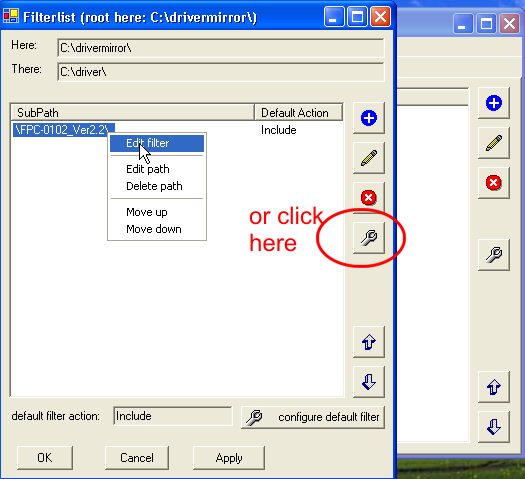
Now you can set up the filter expressions the same way as in the case of the default filter. Click with the right mouse button on the subdirectory in the list, and from the popup menu choose Edit filter. Or click on the tool botton.
There is only one difference: the dropdown box If not in the list then.. now contains three items: either include, exclude or ignore. If the file or directory does not match one of the filter items, the action then depend on what you have choosen in the dropdown box:
- Include: the file or directory is included
- Exclude: the file or directory is excluded
- Ignore: the next filter list (or the default filter list) is used to match the file or directory name.